Access Token from Azure Portal
To obtain an access token from Azure for use with APIs, you typically need to use App Registration under Identity for authenticating and authorizing your application.
Here are the general steps to obtain an access token:
1. Register an Application in App Registration
Register your application in App Registration to obtain an Application ID (Client ID) and configure authentication settings. Follow these steps:
a. Go to the Azure Portal.
b. Search for "App registrations."
c. Click "New registration" and provide a name for your application.
d. Configure the Redirect URI and other necessary settings for your application.
e. Note down the "Application (Client) ID" for future use.
2. Define API Permissions:
Specify the permissions your application needs to access Azure resources or APIs. To do this, navigate to the "API permissions" or "Permissions" section, select Microsoft Graph, and check all the boxes under OpenID permissions. Finally, click "Update permissions" for your application registration in Azure AD.
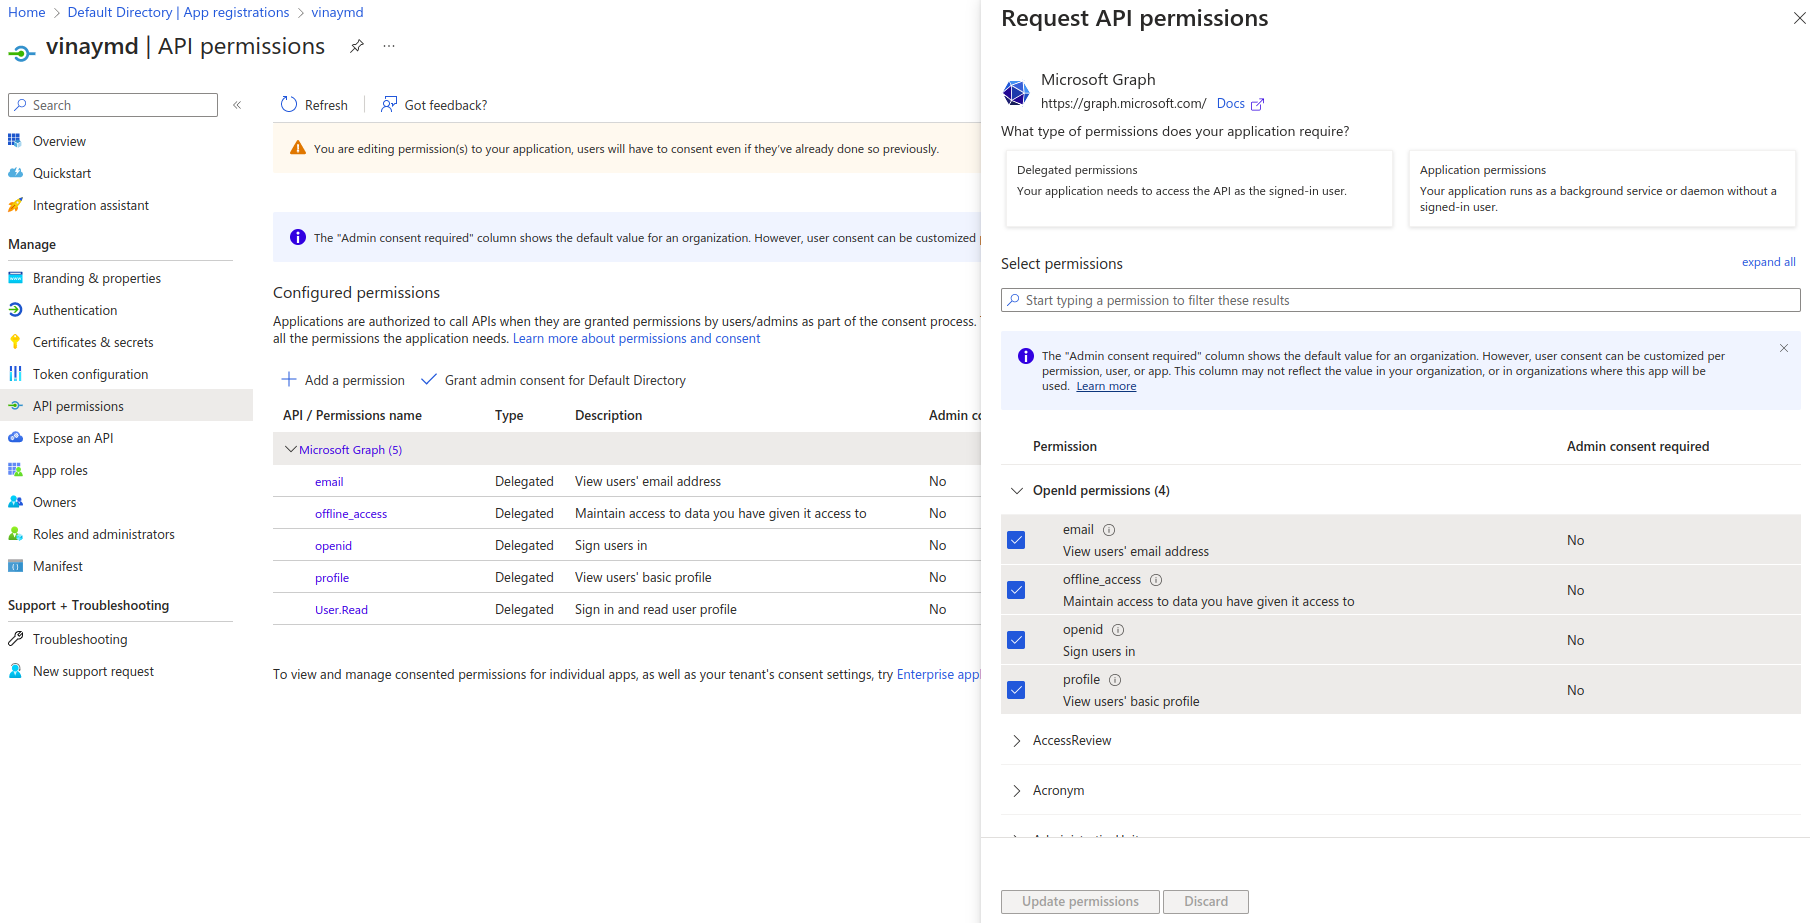
API_Permissions
3. Define Azure role-based access control:
Azure RBAC is a cloud-based identity and access management (IAM) system provided by Microsoft Azure. It's a fundamental component of Azure's security model, enabling you to manage access to Azure resources, specify actions that users or applications can perform, and control what they can do.
To grant RBAC to resource groups, follow these steps:
a. Navigate to the Azure Portal.
b. Search for 'Resource groups.'
c. Select the desired resource group, and click on 'Access control (IAM).'
d. Click the '+' icon, and choose 'Add role assignment.'
e. Under 'Privileged administrator roles,' select 'Contributor,' and click 'Next.'
f. Click '+Select members' to search for your application's name, then click 'Select.'
g. Proceed by clicking 'Next' and 'Review + create.
4. Authentication Flow:
Depending on your application type (e.g., web application, SPA, native app), implement the appropriate authentication flow. This typically involves redirecting users to Azure AD for authentication and authorization. Here are some common authentication flows for different application types:
- For web applications, you might use the OAuth 2.0 authorization code flow.
- For single-page applications (SPAs), you may use the implicit grant flow.
- For server-side applications or APIs, you might use the client credentials flow.
5. Authentication and Token Retrieval:
a. Navigate to your registered application.
b. Select "Certificates and secrets" under the "Manage" section.
c. Click "New client secret," provide a description, and click "Add."
d. A client_secret will be generated under "Value." Make sure to note down this value; it will be displayed only once.
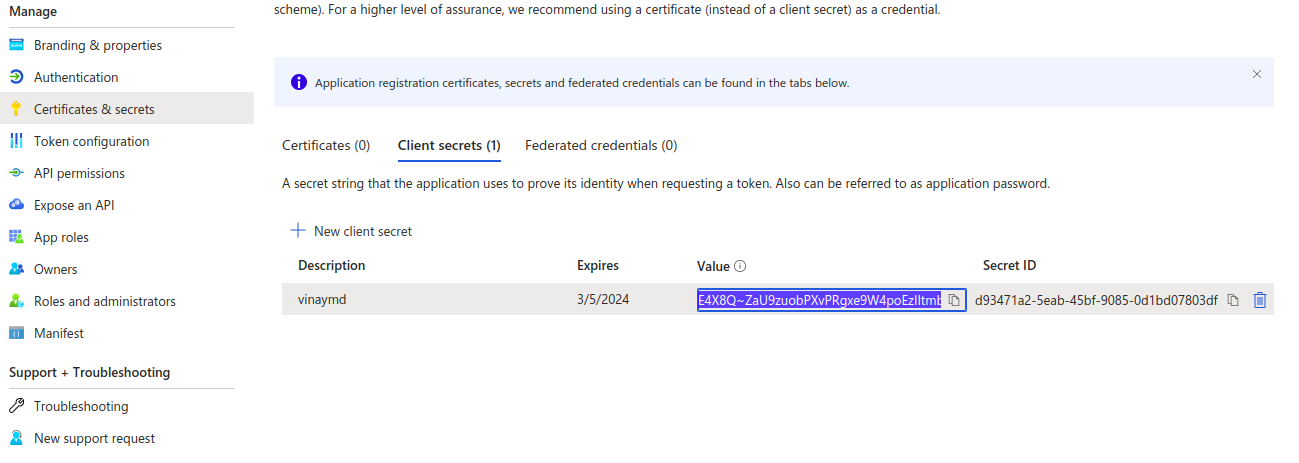
client_secret
To make a POST request to the Azure AD token endpoint, use the following URL format:
https://login.microsoftonline.com/tenant_id/oauth2/token.
In this URL, replace tenant_id with your specific Azure AD tenant ID.
Note: After registration of our application, tenant_id will be generated on the overview page.
In your POST request body, include the following parameters:
- client_id: Your Application ID (Client ID).
- client_secret: Your application's client secret.
- resource: https://management.azure.com.
- grant_type: client_credentials.
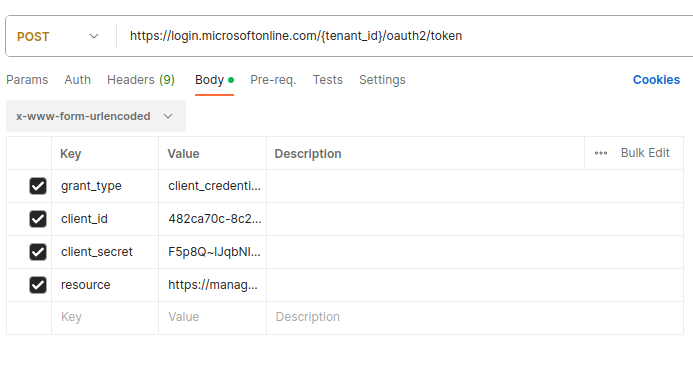
POST_request
After configuring the POST request with the required parameters, click 'Send.' You will receive an access_token in JSON format as the response.
6. Access Token Usage:
After obtaining the access token, use it to authenticate your application when making requests to Azure services or APIs. To do this, include the token in the 'Authorization' header of your HTTP requests.
It's crucial to note that securing and managing access tokens is a critical aspect of application security. Always adhere to best practices for token management, which include secure storage, proper handling of token expiration, and revocation when necessary.
Azure resources in JSON format Using Azure Resource Manager REST API:
To query and retrieve information about your resources using the Azure Resource Manager REST API, you'll need to authenticate your requests with Azure AD authentication and construct the appropriate API endpoint.
For instance, to list all resources, make a GET request to the following endpoint (replace subscription-id with your actual Azure subscription ID):
https://management.azure.com/subscriptions/subscription-id/resources?api-version=2022-09-01
This endpoint will retrieve the desired information.
You can use tools like curl, Postman, or programming languages with HTTP libraries to make these requests. The response will be in JSON format.
For your GET request, include the following parameters under the 'Auth' section:
- Type: Bearer Token.
- Token: Your access token.
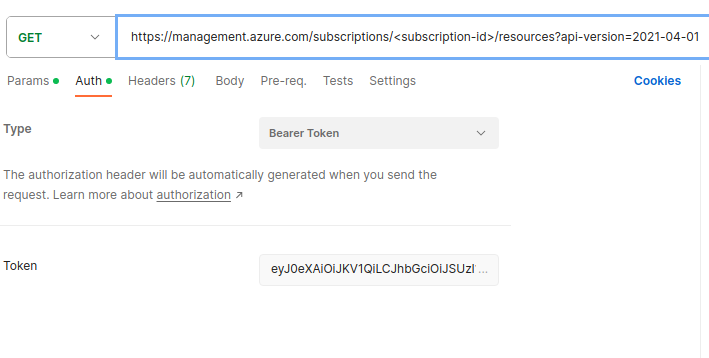
Resource_list
After configuring the GET request with the required parameters, click 'Send.' You will receive Azure resources in JSON format as the response.
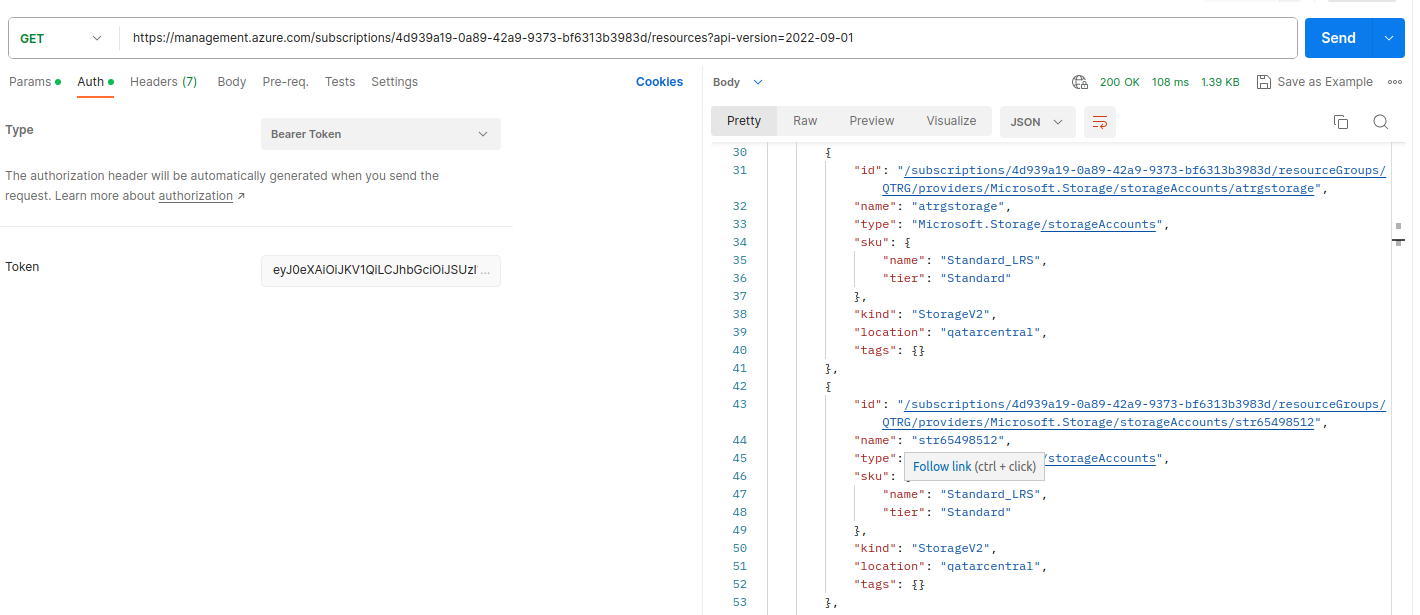
az_resources_json
Please keep in mind that different methods may require specific permissions and authentication mechanisms. Additionally, it's essential to note that the specific API version may change over time. Always verify and use the latest API version when constructing your requests.