Dockerfile
A Dockerfile is a text document that contains all the commands a user could call on the command line to assemble an image.
GitHub Actions
GitHub Actions is a continuous integration and continuous delivery (CI/CD) platform that allows you to automate your build, test, and deployment pipeline. You can create workflows that build and test every pull request to your repository, or deploy merged pull requests to production.
Prerequisites
-
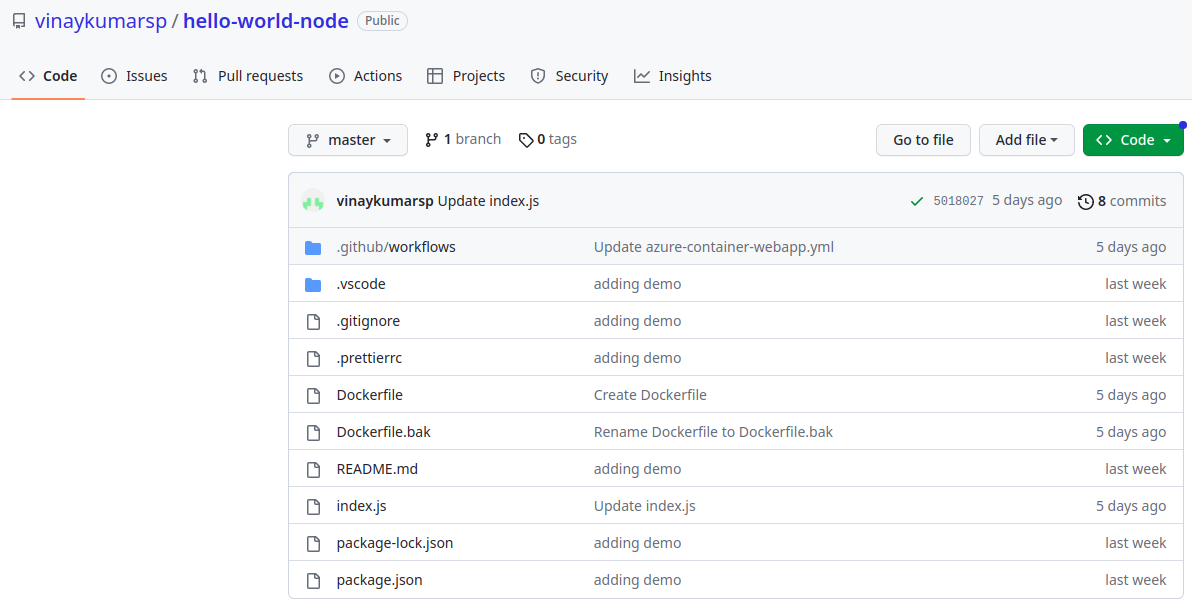
Create an app in any language with an endpoint (we created a nodejs app) and dockerize it (Create a Docker container for it).
-
Create GitHub repository and publish your code to GitHub repo
-
Create an Azure resource group.
-
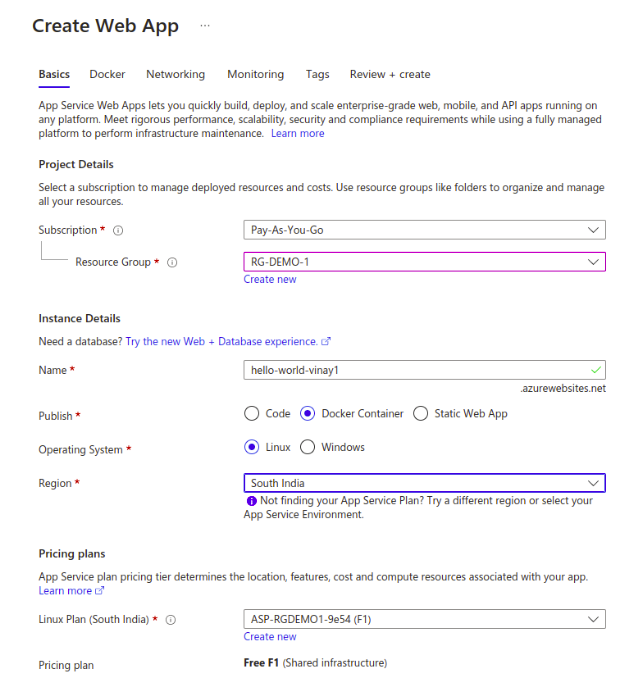
Create a web app.
-
Create Personal Access Tokens
(To create PAT: Go to settings -> Select developer settings -> Click on personal access tokens -> Click on tokens -> Generate new token.)
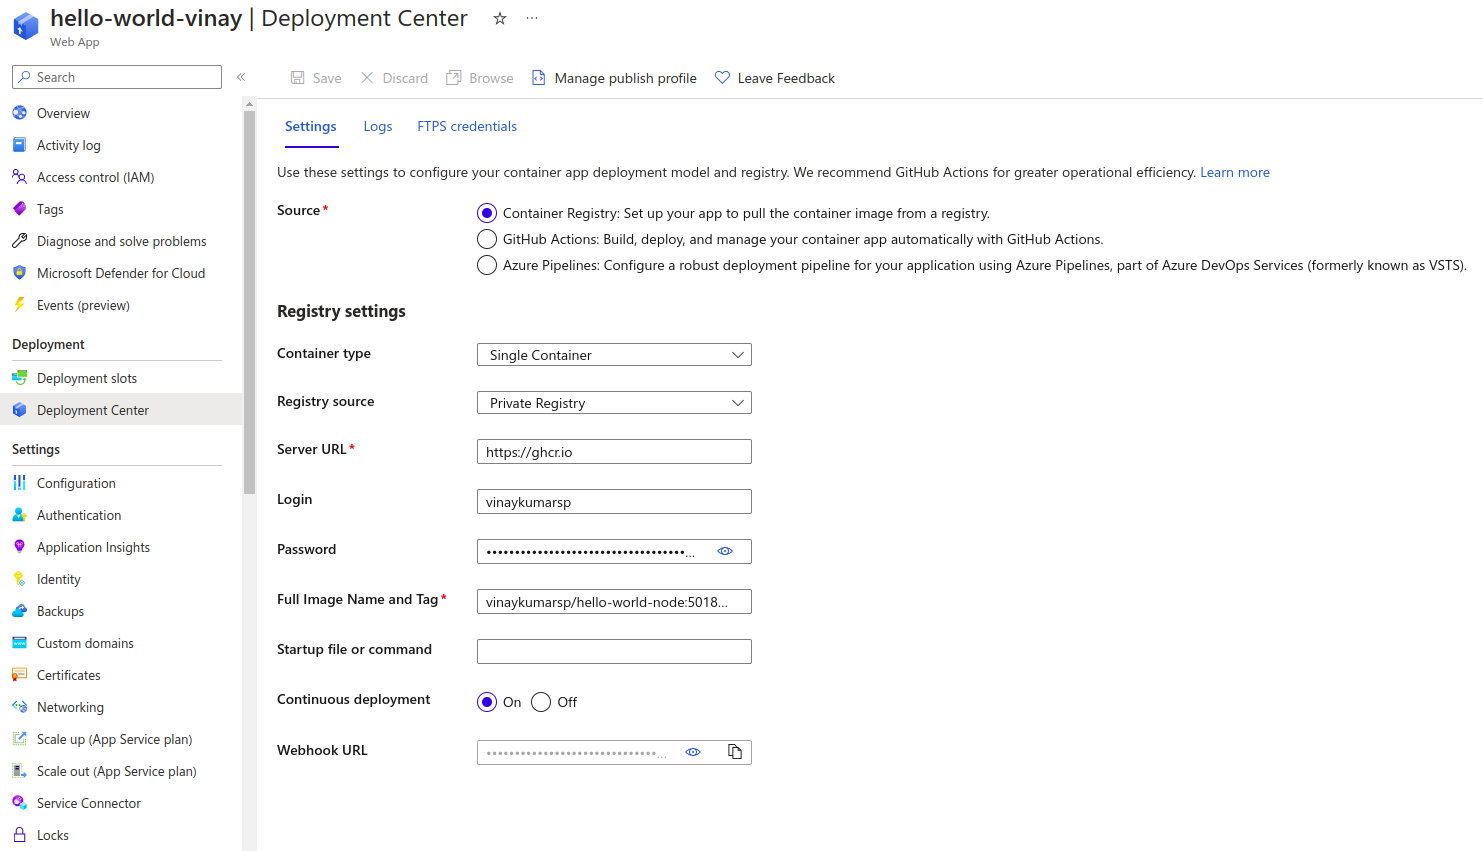
Step-by-step procedure to configure Web App
In Azure portal navigate to App Service and configure Web App as shown below
Next create three app settings on the Azure Web app:
DOCKER_REGISTRY_SERVER_URL: Set this to "https://ghcr.io"
DOCKER_REGISTRY_SERVER_USERNAME: Set this to the GitHub username or organization that owns the repository
DOCKER_REGISTRY_SERVER_PASSWORD: Set this to the value of your PAT token from the previous step

Note: GitHub "username/repo name" in lowercase should be used for image name and tag. Tag is optional.

Creating the workflow
-
Download the Publish Profile for your Azure Web App. You can download this file from the Overview page of your Web App in the Azure Portal.
-
Create a secret in your repository named AZURE_WEBAPP_PUBLISH_PROFILE, and paste the publish profile contents as the value of the secret.
(To create secret: Navigate to setting -> Select security sections -> select secret and variables -> click on sections. Here we store secrets by clicking on new repository secret)
-
Create a GitHub Personal access token with "repo","write:packages", and "read:packages" permissions.
-
Create a secret in your repository named TOKEN, and paste the Personal access token as the value of the secret
-
Change the value for the AZURE_WEBAPP_NAME in the workflow.
Creating AZURE_WEBAPP_PUBLISH_PROFILE and TOKEN in Actions and variables

GitHub repository
Click on Actions then select configure Deploy Node.js to Azure Web App under Deployment section
In workflow assign azure web-app name as shown below:
AZURE_WEBAPP_NAME: hello-world-vinay
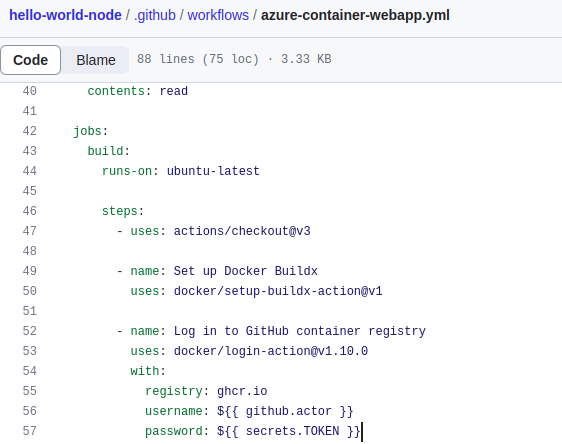
In workflow replace the password as shown below:
password: ${{ github.token}} → password: ${{ secrets.TOKEN }}
Finally, click on Commit Changes and check for Build and Deploy. If deployment is successful, then browse to Azure Web App and check the browser.
Continuous Deployment
As soon as a commit is made to the code, a job should auto-trigger and the deployment process should start. To enable this continuous deployment shoulde be ON.